React/Redux Design Decisions
Für die Erstellung unserer Benutzeroberflächen von größeren Projekten mit dynmischen Inhalt verwenden wir React mithilfe von Redux. Um die Erstellung von Reducern und Action Creators für Entitäten zu erleichtern, möchte ich hier einen simplen Denkansatz vorstellen.
Today there are various different technologies to build up your Frontend and it can be very time consuming to pick the right one for your team. Some of the most common Frameworks/Libraries are: AngularJS, ReactJS and VueJS. So, when we started our previous project Bus-Angebot in 2016, there was (and gladfully still is) a big hype about React. So we decided to give it a try and I have to say, we don’t regret it.
If you have a background in object oriented programming, the Component based approach in React and the state management with Redux could be confusing at the beginning. I assume that you have a basic understanding in those technologies, in order to follow this approach. If not, I recommend reading these informative guides for React and Redux.
Redux
As mentioned above, we use Redux for our state management, because if your project has a certain size it is a very clean way to manage the client’s state. If you are already using Redux without any extensions, you probably know that it can be a big boilerplate to write actions and reducers for every entity. There are already many wrappers and extensions on GitHub, that help you reduce the boilerplate. But I want to show you a very easy way, without any additional extensions. Keep in mind that the following code and descriptions are just snippets to illustrate my approach. But if you are already coding with redux it should be no problem to integrate it into your application.
So let’s start:
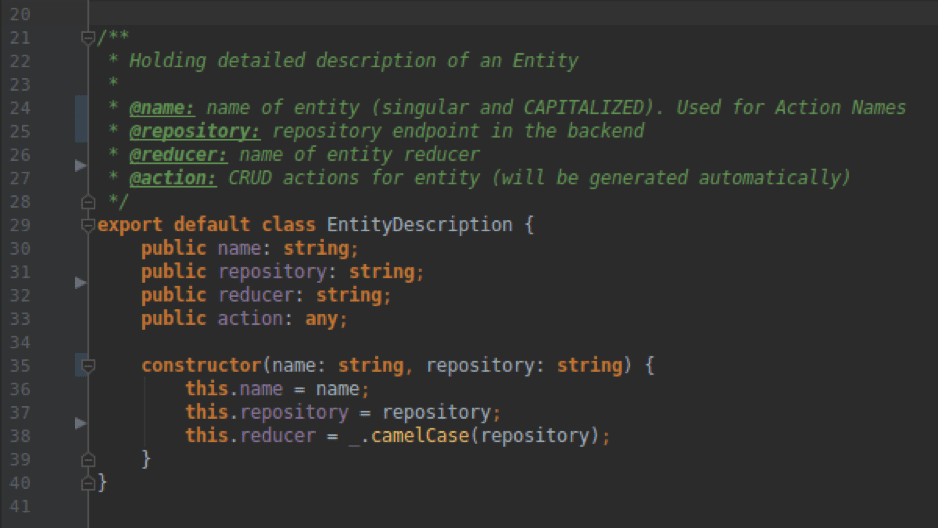
First of all we need some construct, that describes our entities. As we use ES6 and TypeScript we create a simple class to hold the most important information about a single entity (See Entity Description Class).
With the above class we can now create a collection of our entities, that will be used to generate actions and reducers.
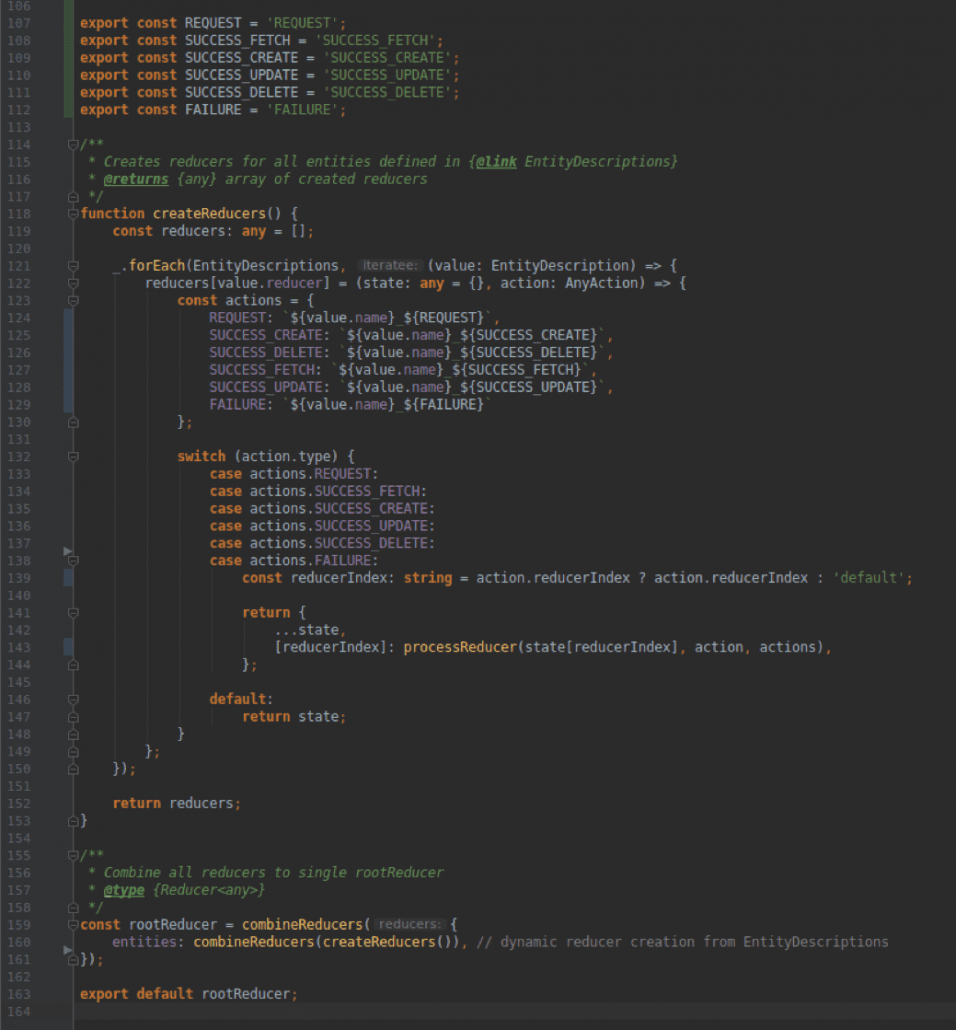
Now its time to automate the generation of reducers for each entity. This will be done by iterating over our entities collection, For each entity we create a reducer, which is able to manage our CRUD actions. Because there are many different approaches how to merge the state from actions into your redux store, I will not dive into a specific one. Just use your own implementation of the processReducer(…) function in line 143 of the following code, for merging the state for each action.
As you can see the createReducers() function will be combined into the root reducer at the end of the above code snippet. With that configuration all the entities you define in your collection will produce a separate reducer, that manages your state.
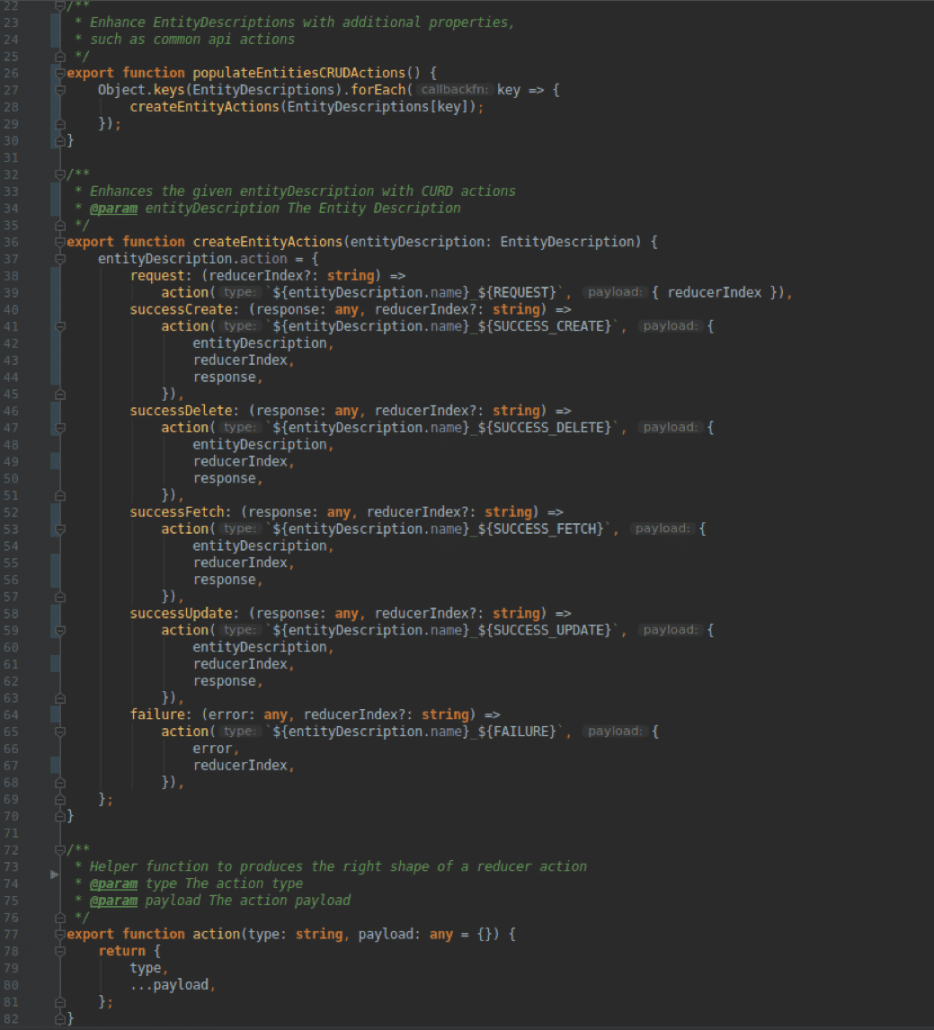
For our action creators we will also iterate over every entity description, in order to populate the action attribute of our EntityDescription class. With the following code snippet you will be able to dispatch actions according to your current api response. For example if you fetch a specific entity, you simply can dispatch a “request” action and when receiving the result you dispatch “successFetch” or “failure” depending on the response.
The optional reducerIndex in each action creator can be used, to further separate your entities in your redux store.
That’s it. Every time you define a new entity in your entities collection you will get a reducer and all actions for handling CRUD. This approach also nicely integrates with selectors and redux sagas.
Dieser Beitrag wurde verfasst von:
Stefan Ploner
Full Stack Development
Weitere Beiträge:


Hinterlasse einen Kommentar
An der Diskussion beteiligen?Hinterlasse uns deinen Kommentar!